Wednesday, December 16, 2009

Christmas is here again


It's almost Christmas! Time has run away with me, again... Yes, it's been like forever since my last post, and a thousand apologies to everyone. I've been busy, lazy and well, expecting a new addition to the family, if that's any excuse! So future posts could be scarce in the coming months, too...

Every year, I make some Christmas cookies for YH's colleagues. This year, despite everything, I wanted to do the same. I had no energy for the usual gingerbread men complete with decorated faces, etc. so I kept things simple and made my favourite cookie recipe - Double Chocolate Chip Cookies. I quadrupled the standard recipe, packed them into little bags, and decorated the bag with a rather garish ribbon and striped candy cane. Ah well, if one can't be a little garish at Christmas, when can one?

Things may get a little frantic for me the next few days/weeks/months, so I just wanted to wish everyone and their families a very Blessed Christmas.

Wednesday, August 26, 2009

Scrambled Eggs with Meat


This dish is easy to make, and great as a bento filler. It's basically minced meat (beef or pork) scrambled together with eggs. My mum used to make this when I was young, and she would serve it with plain rice or rice porridge.

Continue reading...


Scrambled Eggs with Minced Meat
3 eggs
100 - 150g minced beef or pork
half an onion, finely chopped (optional)
1 Tbsp soya sauce
1 tsp sesame oil
salt and pepper
1. Beat the eggs together with the soya sauce, a little salt and pepper.

2. Heat up a frying pan, and add the sesame oil. Add the onion if you are using it (fry until soft), then the minced meat, stirring so the meat does not clump together. 

3. When the meat is cooked, add the eggs and fry. Stir continuously as if you were scrambling eggs, until the eggs are cooked.

4. Taste, and season with more salt and pepper, if necessary.


Tip: If you plan on packing this into your bento lunch and eating it with plain rice at room temperature, make this dish a little more salty.

Back

Friday, August 21, 2009

Swedish Meatballs


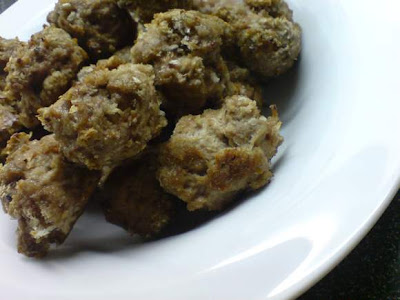
These gloppy-looking round things are supposed to be Swedish meatballs. They taste a whole lot better than they look in the photo, though! I've been wanting to eat Swedish meatballs for some time - I first ate them at Ikea (of all places) - and finally decided to make my own. The great thing about this recipe is that the meatballs are baked, not fried (that sounds like an ad), which means less oil and fat! It also means less time standing at the stove, frying batches of meatballs, which can be time consuming. The meatballs can also be frozen - I made 40 in one batch, so there was enough for dinner, lunch the next day, plus two more batches in the freezer for another day...

Continue reading for the recipe...


Swedish Meatballs
(makes around 40 meatballs)

600g minced beef (as lean as possible)
400g minced pork

You can use half minced beef and pork if you prefer - I just find minced pork (in my area) quite fatty, so I use more beef)

2 large eggs
1/2 cup milk
3 garlic cloves, finely chopped
3 cups breadcrumbs (preferably panko - Japanese breadcrumbs)
1/2 tsp ground cinnamon
1/2 tsp ground nutmeg
salt and pepper

For the sauce:

3 Tbsp butter
1/3 cup plain flour
1 cup milk
500ml beef stock (once I substituted this for lamb stock, as I could only find lamb stock cubes. I added two stock cubes into 500ml water)

1. Preheat your oven to 225 degrees C.

2. In a large bowl, mix together the minced beef and pork, eggs, milk, garlic, cinnamon, nutmeg and breadcrumbs. Season with salt and pepper.

3. Line a baking tray with non-stick baking paper or foil. If you are using foil, lightly grease the foil so the meatballs don't stick.

4. Using a tablespoon or small ice-cream scoop, form the meat mixture into round balls and place them onto the lined baking tray.

5. Bake for 12 minutes, or until browned and cooked through.


To make the sauce:

Melt the butter in a small saucepan, then slowly add the flour and stir rapidly. Cook, stirring constantly for about a minute. Slowly add the milk, and then the beef stock. Bring the mixture to a boil, then simmer for a few minutes until the sauce has thickened a little.

To serve, dunk the meatballs into the sauce, coat them, and place them onto a plate. Serve with boiled potatoes and steamed vegetables, as well as with a scoop of berry jam. The Swedish traditionally eat this with lingonberry jam, but you could also use grape, red-currant or some other tart berry jam. Cranberry sauce would work, too...

Freeze any extra meatballs together with the sauce in freezable airtight containers or bags.

Back

Saturday, August 15, 2009

Avocado Appetiser


This "dish" is so simple that I wasn't going to post about it, but after a really lovely comment I received from someone who complimented me on my simple recipes, I have decided to! 

This is how I first started eating avocados when young...all you have to do is slice a ripe avocado in half, remove the seed, and squeeze some thousand island dressing in the centre (or on the side of your plate). Simple, yet really tasty and satisfying! It works well as an appetiiser, too. For a more elaborate and equally tasty alternative, top the avocado with some boiled prawns and voila - you have a prawn cocktail.

The hardest part about this recipe for me is getting a ripe avocado. The ones at the store are usually very hard, so I have to patiently wait for them to ripen in the kitchen before making this.

Tip: This tastes better when the avocado is chilled in the fridge. Once the avocado is ripe, stick it in the fridge for an hour or two before cutting it.

Monday, July 20, 2009

Tuna Bacon Pasta Salad


Whenever there is a pot luck gathering, I like to bring a pasta salad of some kind. It's easy to transport, easy to make in small or larger quantities, and can be prepared a day ahead of time. For the version I made for last weekend's gathering, I added tuna, bacon, and peppers (capsicum) together with spiral pasta in 2 colours. This pasta is great eaten cold - perfect for bento and picnics, but it can also be heated up if you are serving it at night as a side dish.

Continue reading for the recipe...


Tuna Bacon Pasta Salad
(makes a huge bowl. Decrease the quantities for a smaller portion)
500g spiral pasta (or 250g plain spiral pasta and 250g spinach spiral pasta)
2 red peppers (capsicum)
2 yellow peppers (capsicum)
1 green pepper (capsicum)
200 - 300g bacon (I use back bacon as it has less fat)
2 x 185g canned tuna (in water or olive oil)
2 cloves garlic
light olive oil (or other cooking oil)
1 1/2 Tbsp tomato paste
Note: The different coloured peppers (capsicum) are used to make the pasta more attractive - you can also just use one colour if you prefer.

1. Cook the pasta in salted boiling water according to the instructions on the packet (less 1 minute). Drain, rinse under cold water to stop the pasta cooking, then set aside.

2. Dice the red and yellow peppers (capsicum) into small pieces. Dice the green pepper (capsicum) into small pieces and set aside separately. Chop the bacon into small pieces.

3. Peel and chop the garlic.

4. In a large pot (I use the same pot I used to boil the pasta to save on washing up) add a little olive oil (or cooking oil) and fry the bacon on medium heat. Add the red and yellow peppers (capsicum) and fry lightly. Add the canned tuna and stir. Pour the mixture into another bowl and set aside. 

5. Rinse out the pot, then add some olive oil (around 4 - 5 Tbsp depending on the amount of pasta you made). Add the chopped garlic, and over low heat, slowly fry the garlic until fragrant and golden. Be careful not to brown or burn the garlic. 

6. Turn the heat to high, and pour the cooked pasta into the garlic oil. (You may need to rinse the pasta a little to loosen it if it has stuck together.) Coat the pasta with the garlic oil, then turn the heat to low, and add the tuna bacon mix. Add the tomato pasta, and season with freshly ground black pepper and a sprinkle of salt. Turn off heat, add the uncooked chopped green peppers (capsicum) and stir well. Taste, and season with more pepper, salt and tomato paste if necessary. (The tomato paste is used to add flavour, not to make the pasta taste tomato-y.)

Tip: I find the flavours of the pasta develop well when left in the fridge overnight. If you are making this for a gathering, picnic, or for your bento, make the pasta a day ahead and store it covered in the fridge in an airtight container. Remove it from the fridge and allow it to come to room temperature before serving.

Back

Teriyaki Cod


For some reason, I don't cook fish very often. I think it is because I just have it in my head that fish is a bit fiddly to make. However an easy recipe and one of my favourite fish recipes is teriyaki cod fish. This dish is also perfect to put into your bento lunches. (To be honest, a good slice of cod fish is quite expensive here, so I don't make this that often.)

This is a slight update on the recipe I posted for this dish before- this is now my latest standard way for making all things teriyaki... 

Teriyaki Cod Fish
2 pieces black cod fish fillet
4 Tbsp soya sauce
3 Tbsp sake
3 Tbsp mirin
2 Tbsp sugar

1. Mix the liquids and sugar together until the sugar has dissolved. Marinate the fish in the liquid for 15 minutes.

2. Heat up a small frying pan, and add the fish. Leave for a minute, then turn over. When the fish is just cooked through, remove from the pan.

3. Pour the rest of the marinade into the pan, and let it bubble until the liquid has reduced and thickened into a sauce. Turn off the heat. Coat the fish with the teriyaki sauce and serve. 


Back to Bento


After a (long) break, I'm trying to get back to making bento - just a simple one, made with one of my favourite bento staples - Beef and Tofu meatballs (you can't taste the tofu at all, but adding tofu makes the meatballs juicy, even after it has been frozen and re-fried). Here, they have been glazed with homemade teriyaki sauce. The rest of the bento is just some edamame, a happy hard boiiled egg, and rice. Simple, but filling and tasty.

Teriyaki sauce
4 Tbsp soya sauce
3 Tbsp sake
3 Tbsp mirin
2 Tbsp sugar

Mix all the ingredients together in a small frying pan, and heat over medium heat until bubbling. Keep the sauce bubbling (adjusting the heat lower if necessary) until the liquid reduces and thickens. Add the meatballs and coat with the sauce. (If you are defrosting the meatballs, make sure you fry them until the meatballs are fully heated through.)

Wednesday, July 8, 2009

Chicken Salad

chicken salad
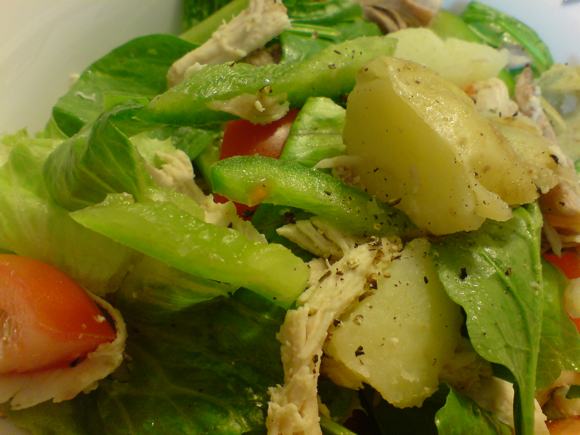
Ever been asked in a survey what dish you would pick if you could only eat one thing for the rest of your life? Well, if I had to choose, it would be chicken salad. There's something about cold chicken and raw vegetables that just work so well together. 

With the summer heat truly upon us in Hong Kong right now, many a night I feel like something cool and refreshing. It may seem too light a meal, eating salad for dinner, but if you add enough goodies inside it, it makes for quite a filling dish.

There are endless variations to the chicken salad, but my favourite is a mixture of vegetables, potato and chicken without (egads!) any dressing. Firstly, I'm not too fond of mayonnaise or any other dressing overpowering the salad, and secondly, I'm always trying to cut down on the calorie intake. Plus, if your veggies and chicken are fresh, the natural taste of the dish is really all you need. And if you must, put some dressing on a side dish and mix a little as you go along, rather than pouring it all in at the start...

My favourite chicken salad combo right now is:

Shreddded chicken (roast chicken gives the salad more flavour, but you can also poach or panfry some chicken), lettuce, baby spinach leaves, roma tomatoes, baby potatoes (microwaved or boiled until soft and melting), sliced green peppers (capsicums), mixed together with a healthy dose of freshly ground black pepper. Yum!

To make the salad more filling, you could also add some spiral/shell pasta, or some corn...

Fruit Salad

fruit salad
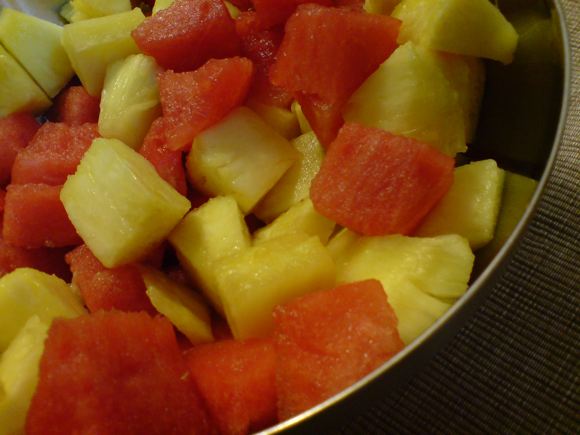
This is not the most exciting of photos, or recipes, but it's been one of our favourite desserts lately - fruit salad. I suppose a fruit salad should have more than 2 types of fruits inside it, but that often doesn't bother me... It's a great way to get reluctant fruit eaters (such as myself) to enjoy fruit. Somehow, eating an apple or watermelon is a bit boring, but when you chop it up and mix it with another fruit, the blending of flavours makes the experience more tasty and satisfying. It's also a great way to use up fruit which you've bought but discover isn't so sweet, or is a bit dry - just mix it with a slightly sweeter, riper fruit or a more juicy one.

Combinations I like right now, although basically any fruit combo would work-

  • watermelon, pineapple (with or without seedless grapes) - this works especially well if your watermelon is not too sweet, and your pineapple is very sweet. This combo is also good with a squeeze of lime juice);
  • apples, plums, peaches and chinese pears (takes longer, but I find peeling the skin off the fruit makes it blend together better);
  • strawberries, kiwifruit, blueberries and chinese pears;
  • watermelon and green seedless grapes (put chopped watermelon squares and grapes into little glasses and freeze them for few hours for a nice icy treat!)

Sunday, June 21, 2009

Baked Chicken Breast with Tomato n Cheese

tomato chicken
This dish (although it looks like a gluggy mess in the photo) is fast becoming a favourite with me because it is so easy to make. It is a little like chicken parmigiana, but unlike chicken parmigiana, which is first breaded, fried and then baked, this dish is just baked - which means you throw all the ingredients into an oven-safe dish, and plonk it into the oven. Done!

Chicken breast works well in this dish - because it is baked in the tomato liquid, the chicken remains juicy and does not dry out.

Method:
Preheat your oven to 200 degrees C.
Place a raw chicken breast into a shallow medium size oven-proof dish and season with a little salt and pepper. Open a 400g can of chopped tomatoes in their natural juices (I use Waitrose brand) and pour over the chicken. Top the chicken with some shredded cheese (I use a mix of parmesan and cheddar cheese, you can also use mozarella). Bake the chicken for 30 - 40mins until the chicken is cooked (the juices will run clear). 

(If you happen to have a convection oven, you can decrease the cooking time by using a combination bake and microwave function)

Serve with vegetables and pasta or potatoes. Shorter pasta such as spiral, macaroni or ravioli works well because you can coat the pasta with the excess tomato and cheese sauce.

Tip: For this dish, I like to buy ready-made pasta like ravioli stuffed with roasted vegetables. It's a slightly more expensive alternative, though...but a nice treat...

In a Pasta Rut

chilli pasta
Sometimes I get so caught up making the same thing over and over again, there is nothing new to post. It's been a little like that lately, with poor YH constantly being served my regular favourite dishes (not that he ever complains). 

My obsession with pasta took on a life of its own last week, when we ate pasta 4 days out of 7! If you happen to get into a pasta rut like me, a nice way of making things more interesting is to explore the different types of pastas available. I found one interesting dried spaghetti with chilli in a little Italian deli, which was orange in colour. The pasta was made out of durum wheat semolina, water and red hot peppers (peperoncino). Since I love all things spicy, I had to buy it at once, and used it to make my Scallop & Sausage Aglio Olio spaghetti. The chilli spaghetti turned a lovely light tomato red colour when cooked, and a little to my surprise, you could still taste the chilli in the spaghetti (I thought the chilli might have been washed out or watered down after being boiled).