Showing posts with label rice. Show all posts

Thursday, April 9, 2009

Teriyaki Chicken Mushroom Rice

chicken mushroom rice

This one pot, one dish meal was created out of a need to prepare something hot and satisfying with a minimal amount of preparation and cooking. All you need to do is cut and marinate the chicken and mushrooms, and dump them with the rice into a rice cooker. The rice cooker takes care of the cooking, leaving you free for other things. Simply serve it up when the rice is cooked, with a side of greens if you must, or on its own (I figure mushrooms are vegetables, too!). Japanese or Korean pickles (eg. takana - mustard greens) work very well with this dish too.

The rice is great for bento as well, so you can pack up any leftovers for lunch the next day.

Continue reading for the recipe...


Teriyaki Chicken Mushroom Rice
(serves 2)

150 - 200g boneless chicken thigh meat
10 - 12 chinese or shitake mushrooms
240g long grain white rice (uncooked)
240ml water
1 - 2 cm piece ginger
5 Tbsp soya sauce
3 Tbsp sake
3 Tbsp mirin
2 Tbsp sugar
dash pepper

1. Mix the soya sauce, sake, mirin, sugar and pepper together in a medium sized bowl. Peel the ginger skin (with a spoon) and slice the ginger into thin strips. Add to the marinade.

2. Trim the excess fat from the chicken meat and cut into generous bite-size chunks (around 1.5 inches). Slice the mushrooms. Add the chicken and mushrooms to the marinade and mix well. Set aside for around 5 minutes as you prepare the rice.

3. Add the uncooked rice into the inner pot of your rice cooker, and wash the rice under cold running water until the liquid is clear. Drain, then using the same cup in which you measured out the rice, add an equal amount of cold water. (Your rice cooker usually comes with a measuring cup. For me, 240g rice equals to 1.5 cups of my rice cooker cup. I then use the same cup to measure an equal amount of water, ie. 1.5 cups).

4. Pour the chicken and mushrooms, along with the marinade over the rice, and switch your rice cooker on (use the setting you normally would to steam plain white rice). 

5. When the rice cooker has completed cooking the rice, let it sit covered for a few minutes, before opening the rice cooker. Stir the chicken, mushrooms and rice together well to distribute the sauce evenly. Scoop the rice into bowls and serve with green vegetables, and/or Japanese pickles. 

Tip: Refrigerate any leftovers in a bowl, covered with plastic wrap, and pack it in a bento container for lunch the next day. The rice can be eaten at room temperature, but you could pack it in a thermos, or microwave-safe bento.

Back


Sunday, January 11, 2009

Chinese Rice Congee

porridge
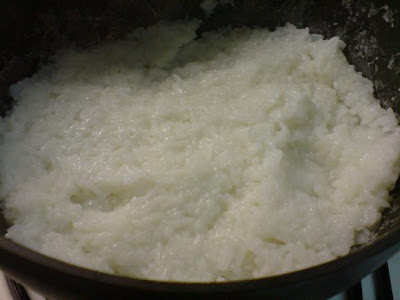
Rice congee, or rice porridge, is a very popular dish in Asia. It is often eaten for breakfast, supper, or as a substitute for rice, and there are many different styles - thick, thin, plain, or boiled with other ingredients. My favourite style is the traditional Cantonese style of congee, where the rice has been boiled a long time and has broken down into a very smooth, medium-thick liquid. 

Although congee is available all over Hong Kong, I still like to make it at home (for dinner). It's the laziness speaking again, but I usually follow my mother's recipe and make chicken congee, which is basically just boiling a roast chicken, rice and water together until the rice and chicken are both soft and tender. If you have a large rice cooker, making congee is a snap. However it is also easy to make in a large pot, and if you like the rice in your congee smooth and broken down as I do, I discovered a quick and easy method of making smooth congee without having to boil it for hours.

Continue reading...


(Chicken) Rice Congee
(makes a large pot, enough for 4+ servings)
240g rice
half roast chicken (with or without the skin)
water
chicken stock (optional)
spring onions and ginger (optional, as garnish)
1. In a medium-sized saucepan, add the rice and some cold water. Swirl the rice around the pot with your hand to "wash" it. Pour away the water and repeat, until the water runs clear. Drain, then add 2 cups cold water.

2. Cover the saucepan and bring the rice and water to a boil. When it is boiling, remove the lid and allow the rice and water to continue boiling on medium high heat. Stir the rice frequently with a plastic ladle.

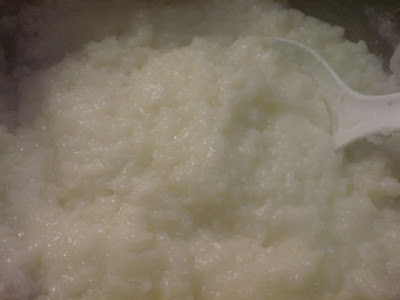
3. When you see most of the liquid has been evaporated or absorbed by the rice, stir and mash the rice with the ladle. This aids the rice in breaking down faster. When most of the liquid has disappeared, stir another 1/2 cup of cold water into the rice.

porridge2

4. Continue to stir and mash, and add another 1/2 cup cold water into the rice. Continue mashing the rice with the ladle until it is soft and the grains have broken down.

porridge3

5. Once the rice is soft and mushy, add more water and stir until you reach the consistency of congee you like - this may be thick, or thinner, according to your preference. Add the roast chicken. You may need to transfer everything to a larger pot at this stage. If you are making plain congee, boil the congee for a bit longer, then season as per Step 7.

6. Boil the rice and chicken until the chicken is tender. The rice will thicken slightly again, so add a little more water if necessary. Pick out the chicken bones before serving (or if you are lazy like me, and not feeding this congee to children, you can leave them in!)

7. Taste and season with white pepper, salt, and some chicken stock (if required). Sprinkle some chopped spring onions and ginger on top before serving (optional).

Optional: If you have some chicken/turkey/pork bones lying around (!), you can use this as stock for additional flavour. Put the bones in another pot, cover them with water and boil. Keep the stock liquid boiling as you boil the rice, and add the stock liquid to the rice instead of the plain water.

Tip: Instead of chicken, you can also add fish fillets, or minced pork.

Back


Sunday, November 30, 2008

Making Your Own Temaki (Handrolls)

california roll ingred

A great way to enjoy sushi at home without all the fuss of rolling and slicing, is to make temaki sushi (handrolls). Temaki sushi is simply sushi rice with various toppings on a rectangular piece of nori seaweed, which is then rolled up into a cone-shape (imagine an ice-cream cone, where everything is inside the cone instead of on top, although I shudder a little at making that comparison). 

Your temaki sushi may be as beautiful or as ugly as you wish - mine turned out so ugly I couldn't bear to photograph them, but their looks didn't detract from the taste. Anyway, the whole point of making these handrolls is to enjoy the sushi, without worrying about how it looks. As presentation in sushi is usually very important, making ugly handrolls for private home consumption is actually quite liberating...

This is also a great dinner party suggestion, where guests can roll up their own temaki handrolls - it's interactive, and great if you have fussy eaters or a mix of vegetarians and carnivores at the table... Also, you can prepare all cooked meats/seafood, so those wary of raw Japanese food can also enjoy this dish... 
Continue reading...

What you need to make your Temaki Sushi (handrolls):
  • A pot of sushi rice (Maki at Just Hungry has detailed instructions on how to make sushi rice. If you are lazy like me though, I just cook some white, short-grained Japanese rice using a rice cooker, then mix in a little sushi vinegar and stir through whilst rapidly fanning it);
  • Rectangular sized pieces of nori seaweed (you can buy them in long rectangles - look for pictures of temaki sushi on the packet - or you can buy large squares of nori and cut it into half);
  • Sauces - Japanese mayonnaise (eg. Kewpie), soya sauce, wasabi;
  • A platter of fillings for the handrolls. There are a huge variety of fillings that you can add, and feel free to be as traditional or as non-traditional as you wish. Just slice everything up into strips. Here's what I had on my platter -
Avocado
Cucumber
Imitation Crab sticks
Tonkatsu Pork (I cut the pork into strips first, then battered and fried it)
Fried Egg (cut into strips)
Tobiko (flying fish roe)
Teriyaki Chicken
The various combinations of handrolls I made were:
California - avocado, cucumber, crab sticks, egg, tobiko and japanese mayonnaise;
Teriyaki Chicken - teriyaki chicken, cucumber, egg, avocado and mayo;
Tonkatsu - tonkatsu pork, cucumber, avocado, mayo.
Other suggestions for handroll fillings:
Raw salmon or tuna (buy sashimi quality fish, and slice them up into long strips)
Canned tuna (with mayonnaise)
Canned salmon
Crab meat
Prawns (boiled or battered)
Butter lettuce
Directions:
  1. Scoop and flatten some sushi rice onto one end of a rectangular piece of nori seaweed. 
  2. Lay the fillings on top of the rice.
  3. Roll up the nori seaweed with the rice and fillings inside to form a cone-shape.
  4. Dip the handroll into a little soya sauce mixed with wasabi (optional) and eat!
Back


Friday, October 17, 2008

Vegetarian "Riceapple" & "Grapeplant" Bento

pineapple eggplant design bento
This week's theme at the BentoChallenge LiveJournal Community was "Vegetarian" as this month is Vegetarian Awareness Month (which I was not aware of)! I found this week's challenge to truly be a challenge, as I am a gleeful carnivore. (A funny quote I read once by someone I've forgotten goes, "I didn't get to the top of the food chain to eat vegetables".) Jokes aside, I do respect vegetarians and went through a (short but memorable) vegetarian period myself. 

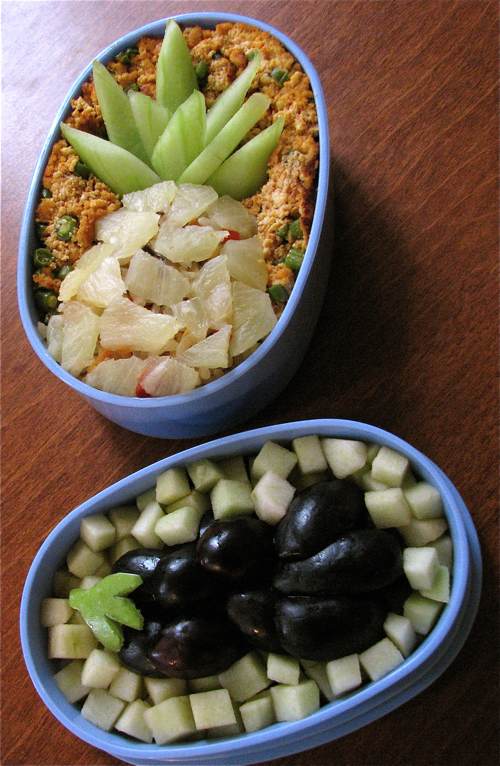
Anyway, back to the bento. I pondered about what to make and what design would be suitable. In the end, YH struck upon a great idea of grapes being turned into an eggplant. The "grapeplant" is made out of seedless black grapes, with a green apple stem, on a background of green apple cubes.

For the main part of the lunch, I finally decided on a Thai food theme, and made vegetarian pineapple fried rice (with mushrooms instead of seafood) and red curry tofu cakes with beans (instead of the more common thai fish cakes). I covered the fried rice with extra pineapple, and cut out pieces of cucumber for the top of the "riceapple". There's also a thai-style dressing (not pictured) to pour over the cucumber and tofu cakes (which have been crumbled at the top to form the background for design purposes). 

Click here for the Vegetarian Pineapple Fried Rice recipe

A basic fried rice recipe is here.

The thai-style dressing is here (previously used for my pineapple salsa).


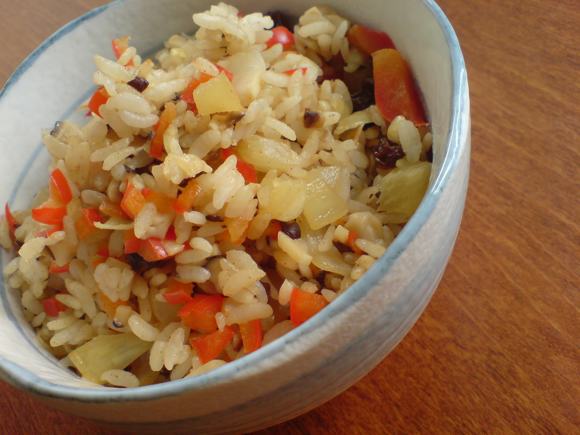
Vegetarian Pineapple Fried Rice


This is a variation of my previous Fried Rice recipe. The method to frying the rice is the same, but the ingredients are listed especially for a vegetarian pineapple fried rice. Continue reading for the recipe...


Vegetarian Pineapple Fried Rice
(serves 1)
1 cup cooked rice (cooled)
1/4 small onion, chopped
2 cloves garlic, chopped
4-5 Chinese or Shitake mushrooms, chopped (if dried, soak mushrooms in water until soft)
1/2 red or green capsicum (sweet pepper), chopped
1 slice pineapple ring, chopped (canned or fresh)
handful of raisins
curry powder
1 tsp soya sauce
1 tsp Thai fish sauce
white pepper
light olive oil, for frying
  1. Heat up a little oil on medium heat in a frying pan.
  2. Add the onion and garlic, fry until fragrant and the onions are translucent.
  3. Add the chopped capsicum (sweet pepper), mushrooms, pineapple and raisins.
  4. Add soya sauce, fish sauce and shake some curry powder into the rice (add more or less according to your preference).
  5. Fry everything until the vegetables are cooked.
  6. Season with pepper, taste, and add more soya sauce, fish sauce or curry powder if necessary.
Tips:
For added protein, crack an egg into the rice after Step 5 and stir until the egg is cooked.

Change this into a non-vegetarian dish by adding some seafood (prawns/squid) or minced pork/chicken. (Add the meat after the onions and garlic, fry until cooked, then add the vegetables in Step 3. For seafood, which cooks quickly, add it together with the vegetables in Step 3.)

Back


Monday, September 1, 2008

Onigiri Bento

onigiri bento
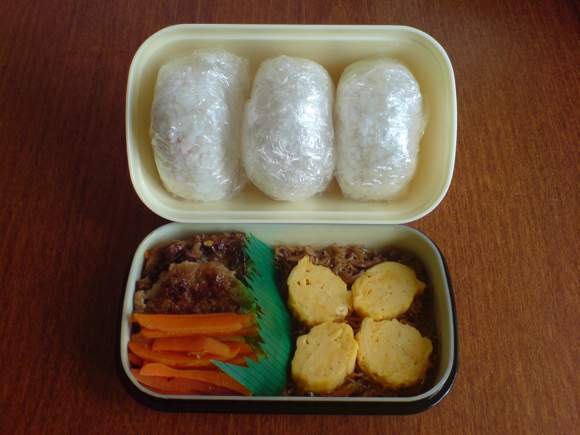
I usually don't go grocery shopping on weekends, so on Mondays I'm forced to use up whatever is in the fridge. Today was no exception - I used up the remaining salmon flakes I had for the onigiri (rice ball) filling, and defrosted some more meatballs. I made a tamagoyaki (fried egg) with the last two eggs in the fridge and stir-fried a carrot with sesame oil and chilli flakes. 

onigiri bento
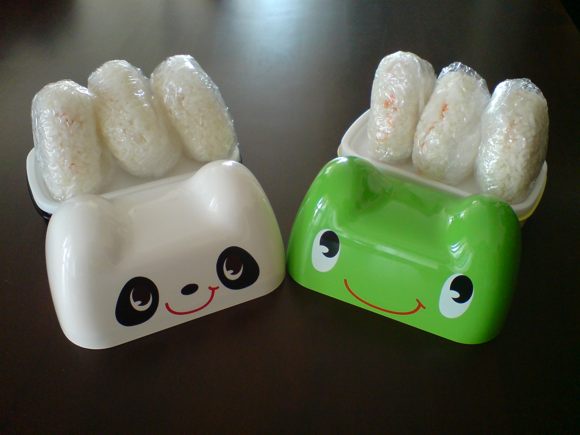
I was very pleased with my new onigiri bento boxes - they worked very well. I don't like wrapping the onigiri in nori (seaweed) in advance, as the nori will get soggy. instead, I packed the nori in a separate ziplock bag and wrapped the onigiri in the seaweed just before eating. It is a bit more fiddly this way, but the crunchy nori makes it worthwhile.

How to Make Onigiri

onigiri bento 


How To Make Onigiri

Onigiri are Japanese rice balls and are often round or triangular in shape. They can be made of plain rice, or have a salty/sour filling inside. They are also often wrapped in nori (seaweed). 

Onigiri is quite simple to make at home. Cook some short-grained rice (using a rice cooker is easiest). You can make the onigiri with plain rice, or sushi rice. I like to make onigiri with sushi rice as it adds more flavour.

For sushi rice, put the rice in a large container and stir in some sushi vinegar (available at most supermarkets or Asian supermarkets these days). If you must, you can also make your own sushi vinegar by mixing rice vinegar, sugar and salt together. Continue to stir the rice and fan it a little as you stir to cool it down slightly. Taste the rice and add more sushi vinegar until you are happy with the amount.

The easiest way to make onigiri is with an onigiri mould. You can find a cheap plastic mould quite easily these days in Japanese supply stores.

Or else, tear off a piece of strong plastic wrap (around 20cm in length) and put it on the palm of one hand (with your palm bent in a cup-shape). Scoop some rice onto the plastic in your palm, add some filling in the middle, and scoop more rice on top to cover the filling. Use a tablespoon or teaspoon to measure how much rice you add so your onigiri are similar in size. Close your palm, gather up the ends of the plastic wrap with your other hand, and twist the wrap together. Squeeze the rice tightly together to form your onigiri, and shape it according to whatever shape you like (round, triangular, etc).

Update: See my post on How To Make a Monokuro Boo Bento for a pictorial guide on making and shaping onigiri this way (See Steps 1 - 4).

Make sure the rice is warm, or the onigiri will fall apart. Re-heat the rice in the rice cooker or microwave if it cools down halfway.

Wrap the onigiri in nori (seaweed) just before eating. You can also wrap them beforehand, if you don't mind soggy nori.

Some common onigiri fillings are plum, salted salmon, tuna, teriyaki chicken.

Back


Monday, August 25, 2008

Pineapple Fried Rice

pineapple rice bento
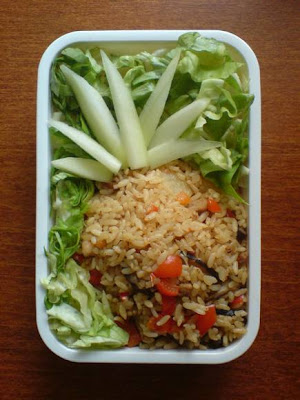
The second bento in my "Pineapple" series is Pineapple Fried Rice. This dish is actually a classic Thai recipe, but I've not followed the usual recipe strictly. 

Fried rice is a great way of using up leftover meat and vegetables you have in the fridge. As I'd made pizza the night before, I had leftover ham, chicken and mushroom. All these went into the fried rice, along with some onion, garlic, one chopped red capsicum, and of course, pineapple. (So... this dish should really be called Pineapple with Leftovers Fried Rice)

There are many variations of fried rice, and people differ as to what they like to include in it. There are things I generally wouldn't include in fried rice (eg. peas or bean sprouts) but there is really no wrong or right, just personal preference. Naturally different countries and cultures have their own traditional style which you can choose to follow - or not! I've included a general method on how to make fried rice, but I've left the actual ingredients open.

Continue reading...


How to Make Fried Rice

Cooked cool rice (great way to use up leftover rice)
Onion (depending on the amount of rice you have, half or one whole onion, chopped)
Garlic (few cloves, chopped)
Meat (optional, but you can include sliced ham, minced chicken/pork, etc.)
Vegetables (whatever you have on hand that can be found in a stir-fry works. Chop or slice everything up into bite-sized pieces, or smaller)
Egg (optional, but it does help bind everything together)
Soya sauce
pepper
Chilli powder (if you want it spicy)
  1. Heat up some oil on medium heat in a large frying pan or wok. 
  2. Add the onion and garlic, fry until fragrant and the onions are translucent. 
  3. Add the meat, fry until cooked (or re-heated). 
  4. Add the vegetables, fry until cooked. 
  5. Add a dash of soya sauce into your cooked rice, stir to loosen up the grains. Then pour the rice into the wok and mix everything together. 
  6. Move the rice to the sides of the frying pan/wok, leaving the centre exposed. Crack an egg into the centre, and stir the egg, mixing it into the rice until the egg is cooked. 
  7. Season with pepper, chilli powder or more soya sauce to taste. Serve on its own, or with some crisp fresh lettuce.
Tips:
For a Thai variation, add a dash of fish sauce during cooking. For a more fragrant Chinese version, try adding a few drops of sesame oil. For a Japanese omurice style, add some tomato sauce in the rice.