Showing posts with label how-to. Show all posts

Tuesday, December 23, 2008

Rudolph Bento

rudolph bento
The Christmas season crept up on me this year and took me completely by surprise. (Yes, decorations have been displayed everywhere for ages, but as they've been up since November, I really lost track.) It finally dawned upon me that if I didn't get my act together it would be next year... so I dug through my bento stash and leftover rice to make this simple Christmas-themed bento.

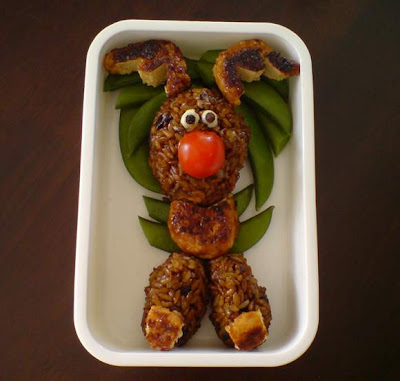
It's Rudolph the red-nosed reindeer, who, by the way, I feel very sorry for. I also object to the song about him - he was laughed at because he looked different, and then he became popular just because he was useful?? Anyway(!), Rudolph's head and legs are made out of mushroom and soya sauce fried rice, and his antlers and body are made out of teriyaki chicken meatballs. He has a cherry tomato nose, and surrounding (and underneath) him is a simple display of grapes and cherries, and some sugarsnap peas. 
Continue reading for a Step-by-step guide on how to make this Rudolph Reindeer Bento...

Step-by-Step Guide: How To Make a Rudolph Reindeer Bento

Ingredients:
  • 5 heaped Tbsp cold, cooked rice
  • 1 clove garlic, chopped
  • sesame oil
  • soya sauce (light and thick, dark soya sauce)
  • 2 shitake mushrooms, chopped
  • 3 teriyaki chicken meatballs (made fresh, or from your freezer stash)
  • 1 cherry tomato
  • 2 black peppercorns
  • small squeeze of mayonnaise
For the rest of the bento (if you wish to follow the bento pictured) or feel free to substitute with other vegetables, fruit, etc.
  • handful sugarsnap peas (boiled)
  • small bunch seedless green grapes
  • 5 - 7 cherries
Equipment:
  • Small paring knife
  • Small non-stick frying pan (to fry the rice) and small saucepan (to boil the sugarsnap peas)
  • 1 bento box (I used a single tier, 630ml capacity container).

Step 1 - Make the Fried Rice

In a small frying pan, add a few drops of sesame oil, and fry the chopped garlic until fragrant. Add the mushrooms, rice, a splash of light soya sauce, and some thick, dark soya sauce. Stir and fry together until the rice grains are well coated with the soya sauce. Set aside to cool.

Step 2 - Make Rudolph's Head
rudolph1
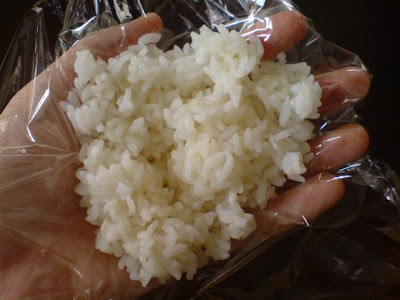
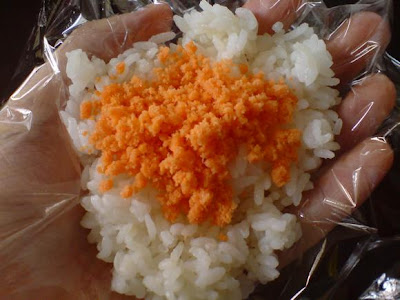
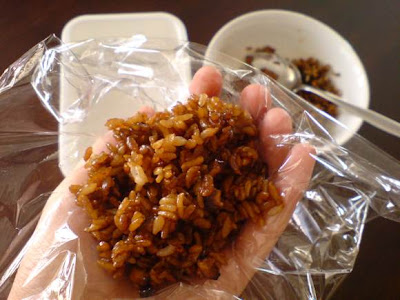
Place a square sheet of strong plastic wrap on your open palm, and scoop 3 Tbsp of warm fried rice onto the plastic.
rudolph2
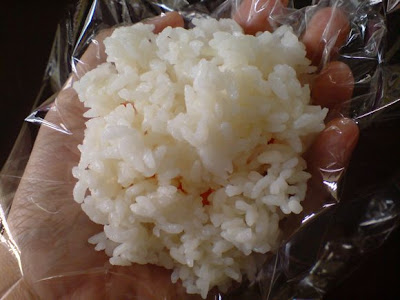
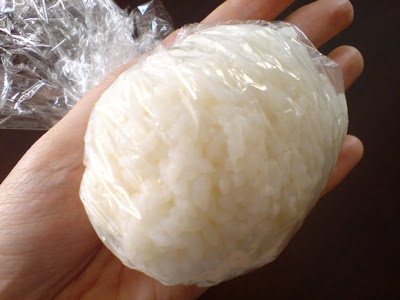
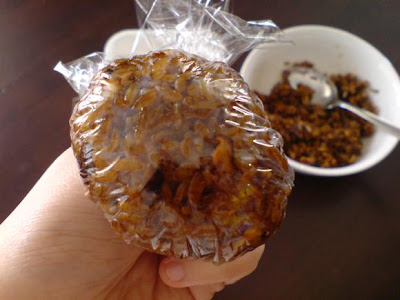
Close your fingers around the rice, which will enclose the rice in the plastic. Twist the plastic at the top and compress the rice ball. Shape one end of the ball so it is slightly pointed in shape. Unwrap the rice and place it in the bento box.

Step 3 - Make Rudolph's Legs
rudolph3
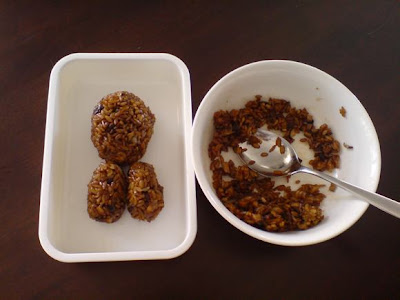
For each leg: Repeat Steps 2 and 3 using 1 Tbsp of rice and squeeze the rice ball to form a long sausage shape. Unwrap and place into the bento box.

Step 4 - Make Rudolph's Antlers
rudolph4rudolph5
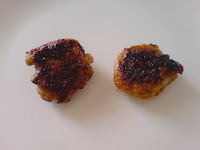
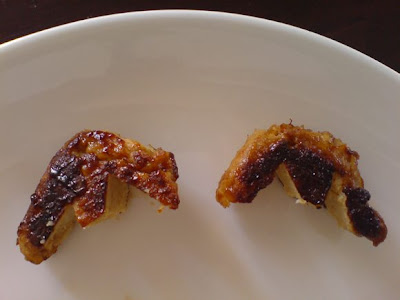
Take 2 meatballs, and cut a small semi-circle from the bottom of each one with a small paring knife. Set aside the semi-circles.
rudolph6
Cut out two small triangles from each of the remaining meatballs (as pictured) to form the antlers.
rudolph7
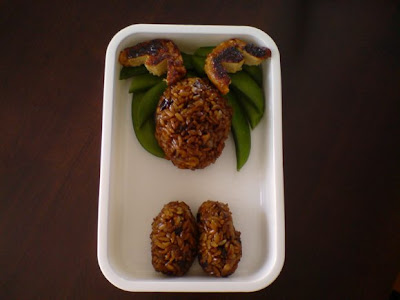
Place some sugarsnap peas into the bento box around Rudolph's head, and then place the antler meatballs above the head. Shift the legs down.

Step 5 - Rudolph's Body
rudolph8
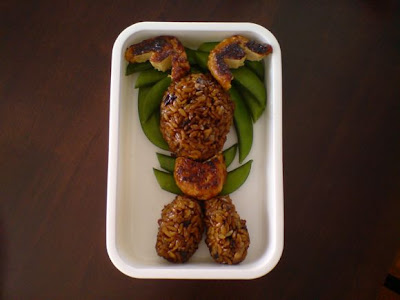
Cut a small semi-circle out of the 3rd meatball, and place it in-between the head and the legs to form Rudolph's body.

Step 6 - Rudolph's Face & Hooves
rudolph9
Slice a cherry tomato into two, and place the bottom part on his face to form the nose.

Squeeze a small amount of mayonnaise onto a dish, and use a chopstick/skewer to dab two small circles of mayonnaise above the nose to form eyes. Stick the black peppercorns onto the mayonnaise eyes to form pupils.

Slice bits of the remaining meatballs into small squares and place them on Rudolph's legs to form hooves.

Step 7 - Filling up the rest of the bento box
Finish off the bento by placing cherries, grapes and some extra sugarsnap peas around Rudolph. I chose these for their red and green Christmas colours, but substitute with other fruits/vegetables if you wish.
rudolph bento

Back

Tuesday, December 16, 2008

Ham n Egg Rolls

ham n egg rolls
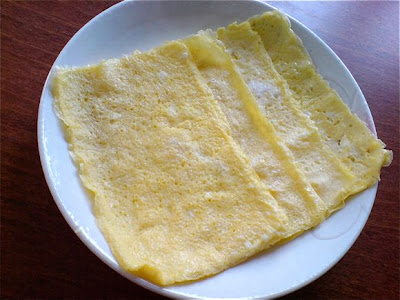
Eggs are extremely versatile, and the same holds true for using eggs in bento. Along with the popular tamagoyaki, another great way of using egg is making a thin omelette (usuyaki tamago). These thin sheets of egg are great for cutting out into little shapes, rolling up, as a wrap or nori (seaweed) substitute, or shredded as a topping for noodles. Recently, I used these thin omelettes to make some ham and egg rolls. Continue reading...

A traditional usuyaki tamago is usually made with a little dashi stock and sugar, as well as cornstarch or potato starch (to strengthen the egg mixture).

However, if you plan on using the omelette to cut out shapes, as I often do, I don't bother to add cornstarch. I'm also not very keen on sweet egg, so I usually just make a savoury, thin omelette - with egg, a splash of water and a dash of salt. I use a small non-stick square pan which is great for making tamagoyaki and square thin omelettes, but a small (round) frying pan works just as well. If you make tamagoyaki often enough, it may be worthwhile to invest in a small square tamagoyaki pan. My one was cheap, and very small (for 1 - 2 eggs). I find the small ones more handy, as you need many eggs to cover the larger tamagoyaki pans.

Ham n Egg Rolls
1 large egg
dash salt
1 tsp water
1 slice of ham per thin omelette (I get 4 thin omelettes out of 1 large egg, but this differs according to the size of your pan)
light olive oil (or other oil for cooking)
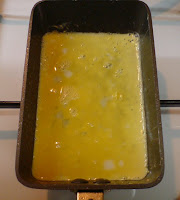
1. Beat the egg well with the salt and water. Heat up a well oiled small frying pan on low heat.
(Edit: You can strain the egg through a strainer for finer results, but I usually don't bother, as you can see from the bits of egg white showing in the picture...)


2. Add a small amount of egg mixture and tilt the pan so the egg coats the base.


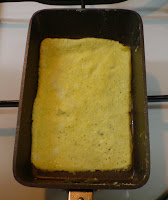
3. When the egg mixture hardens slightly, use a spatula or pair of chopsticks to loosen the sides of the egg. Carefully flip the egg over.


4. Cook for a further 10 seconds. The egg is so thin that it cooks very quickly.


5. Remove, re-oil the base of the frying pan, and repeat until all the egg mixture has been used up.

ham n egg rolls
6. Add a slice of ham on top of each egg omelette, and roll it up together. You can roll it with the egg or the ham on the outside, or a combination of both. Slice into pieces to fit the height of your bento box.


You can also use the thin omelette to decorate your bento by using cookie cutters to cut out shapes from the omelette. 
eg. flower shapes to decorate onigiri.

Back
Sunday, December 14, 2008

Monokuro Boo Bento

monokuro boo bento
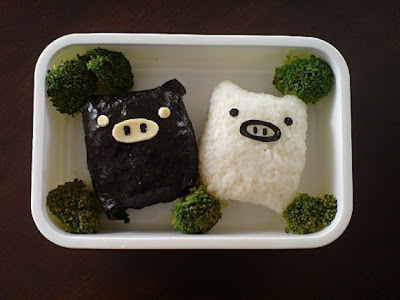
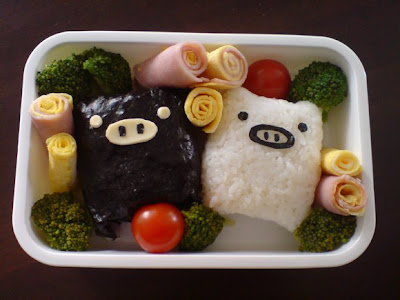
I have taken a short break from kyaraben (character bento) recently as they do take some time to make, and I have not been feeling too inspired. However, when I read that the topic for this week's bento challenge over at the Live Journal Bento Challenge community was "twins", I suddenly wanted to make a Monokuro Boo Bento. I love these monochrome square-shaped pigs by San-X, and to fit the Bento Challenge theme, I have decided the pigs are fraternal twins...

My Monokuro Boo pigs are rice onigiri filled with salmon flakes. One is wrapped, and the other isn't (to form one black and one white pig). They are sitting in a colourful garden of carrot, cheese and egg flowers, edamame, broccoli and cherry tomatoes, and some ham and egg rolls.

Monokuro Boo is quite easy to make, as it is basically a square-shaped onigiri. The hardest part is to cut out the little eye and nose details. It helps if you have cutters, but if not, you can make do with a small, sharp pair of scissors and a little patience. Here's a step-by-step guide on how to make this bento.  Step-by-Step Pictorial Guide: How To Make A Monokuro Boo Bento...


Step-by-Step Guide: How To Make a Monokuro Boo Bento

Ingredients:
(For 2 Monokuro Boo Pigs)
  • 6 heaped Tbsp cooked short-grain rice
  • Filling for the onigiri (I used salmon flakes, but you can use whatever filling you wish)
  • 1 triangular sheet of nori seaweed
  • + extra piece nori
  • 1 slice processed cheese
For the rest of the bento (if you wish to follow the bento pictured) or feel free to substitute with other vegetables, meat, etc.
  • 1/4 carrot
  • 1 large egg
  • 2 slices ham
  • edamame
  • broccoli
  • 2 cherry tomatoes
Equipment:
  • Small paring knife
  • Scissors (preferably small ones)
  • Small circle cutter or a straw
  • Flower-shaped cutter (ordinary cookie cutters are fine), or any shaped-cutter you prefer eg. stars, hearts, etc.
  • Small frying pan (to fry the egg) and small saucepan (to cook the broccoli)
  • 1 bento box (I used a single tier, 630ml capacity container, but you can use other sizes - the amount of food you fit around the pigs will just increase/decrease according to what size box you use.)

Step 1 - Making the Onigiri (Rice Balls)
MB Step 1
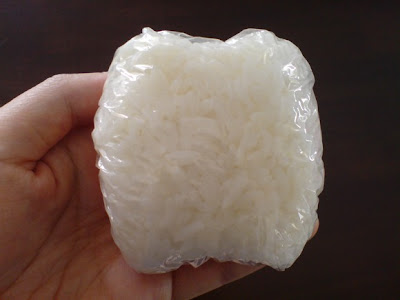
Start by making 2 rice onigiri. If your rice is cold, sprinkle a few drops of water over the rice and warm it up in the microwave. Tear a square-shaped piece of strong plastic wrap and place it on the palm of your hand. Scoop 2 heaped Tbsp of warm rice onto the plastic wrap in your palm.

Step 2 - Filling the Onigiri
MB Step 2
To make an onigiri with filling, add your filling on top of the rice. Here, I have added a few tsps of salmon flakes. Other fillings you can use - teriyaki chicken bits, canned tuna with mayo, minced beef soboro, etc.

If you just want to make a plain rice onigiri without any filling, proceed to Step 3.

Step 3 - Completing the Onigiri
MB Step 3
Add 1 heaped Tbsp of rice on top of the filling to cover it. (For a plain onigiri, just add 1 Tbsp of rice. You can also sprinkle a little salt on the rice for flavour.)

MB Step 4
Gather up the sides of the plastic wrap by closing your fingers inwards (as if you were gripping a tennis ball in your palm). Twist the plastic wrap together at the top. You should now have a ball of rice.

Step 4 - Shaping the Onigiri
MB Step 5
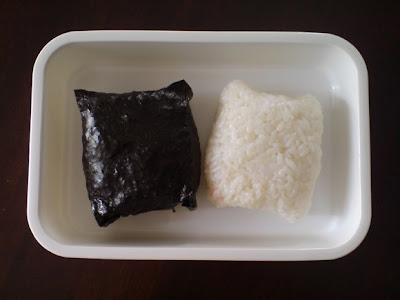
Compress the rice together and shape the onigiri as you desire. As we are making Monokuro Boo, press the rice ball to form a flat square shape, and squeeze out two ears and two feet at each end of the square. Set aside the shaped onigiri in the plastic wrap, and repeat Steps 1 - 4 for the second pig.

Step 5 - Making the Black Pig
(You should now have two pig-shaped onigiri wrapped in plastic.)
MB Step 6
To make the black coloured pig, take one of the onigiri and warm it up in the microwave for 10 seconds. You need the rice to be warm so the nori wraps around it easily.

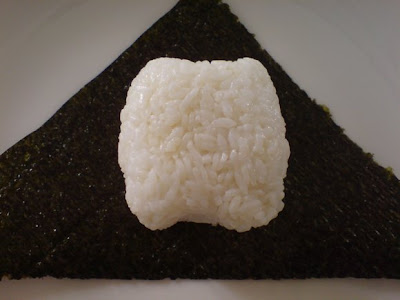
Place a triangular piece of nori (seaweed) on a flat surface. (You can buy triangular-shaped nori, or just cut a big square of nori into half diagonally to form a triangle.) Unwrap the warm onigiri and place it on the nori seaweed.

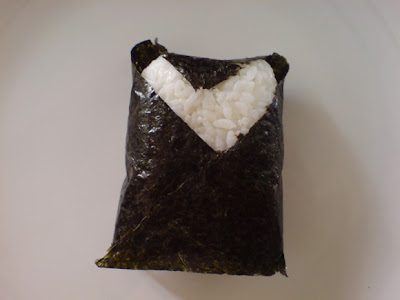
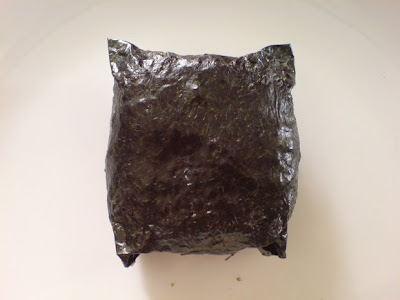
Wrap the nori around the onigiri by tucking the top down (the ears will form quite naturally) and wrap the sides around the square. The back should look something like this -
MB Step 7

...and the front should look something like this -
MB Step 7.5
Tuck and squeeze the nori a little to form the legs.

MB Step 8
Place the wrapped nori pig and the white rice pig into a bento box. Set aside as you prepare their faces.

Step 6 - Making the Eyes and Noses
MB Step 9

Eyes
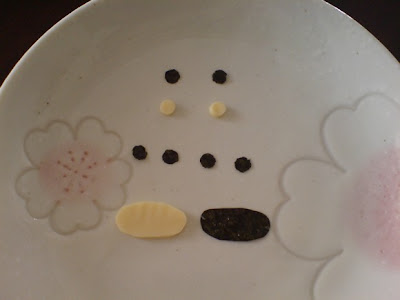
Black Pig: Take a slice of processed cheese and cut out 2 little circles using a straw or a little round cutter.

White Pig: With a small piece of nori, cut out 2 little circles using a nori face punch, or a small pair of scissors.

Nose
Black Pig: With a sharp paring knife, cut out an oval-shaped piece of cheese for the nose. Estimate the size of the nose according to the size of your onigiri pig. Tip: If you are unsure of how big it should be, cut out a larger oval, and slowly trim the ends until it is the right size.

White Pig: With a small pair of scissors, cut an oval out of nori. Try to make it the same size as the cheese oval you just made.

Nostrils
Black & White Pig: Cut out 4 small oval shapes out of nori, using a pair of scissors. The nostrils should be slightly smaller than the eyes.

If you used a nori face punch to cut out the eyes, cut out 4 more small circles, then convert them into oval shapes with the scissors. (This is what I did, therefore the nostrils in the above picture are round as I had not shaped them yet. See the picture below for the shaped nostrils)

Step 7 - Adding the Faces
MB Step 10
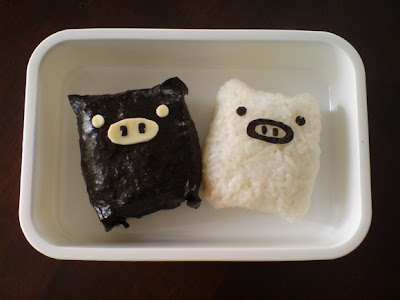
Black Pig: Place the cheese eyes, cheese nose, and nori nostrils onto the black pig.

White Pig: Place the nori nose lightly onto the white pig, then quickly lift it off before it sticks. The nori should now be soft, but not soggy. Fold the nose slightly and make a small cut in the centre with a pair of scissors. Then unfold and cut around the inside of the oval to make an oval ring as pictured. Place the nose on the white pig, as well as the nori nostrils and eyes.

Your Monokuro Boo pigs are now complete!

Step 8 - Packing the Rest of the Bento
Now surround the pigs with colourful vegetables, meat, eggs, etc. of your choice.

Here is what I added:
  • steamed broccoli;
  • carrots (shaped into flowers using a flower cookie cutter. You can also shape them into stars, hearts, etc.);
  • cherry tomatoes;
  • edamame;
  • ham and egg rolls (Edit: Link added for the ham n egg rolls);
  • egg (fried thinly, then cut into flower shapes);
  • processed cheese (cut into flowers - a good way to use up the remainder of the cheese slice).
How I packed the bento:
I began by selecting the "harder", more bulky items. In this case, it was the broccoli, which I added around the sides of the bento box.
MB Step 11

This was followed by the cherry tomatoes and the ham and egg rolls.
MB Step 12

Next, half of the carrots and the edamame were added to fill in the gaps. The remaining carrots were placed on top to create a flower scene, and the egg and cheese flowers were added for further colour and design. The completed bento:

MB Step 13

Back


Thursday, September 11, 2008

Sunflower Bento

sunflower bento
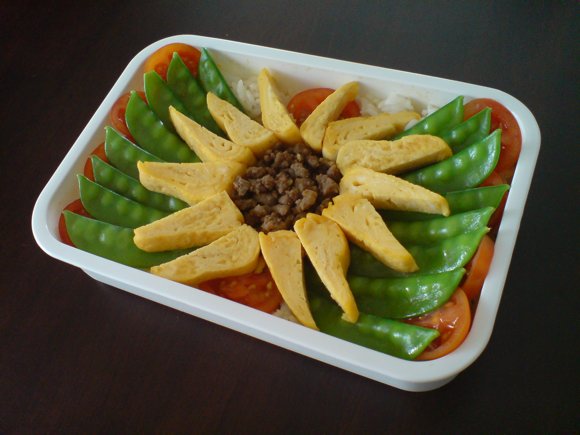
Despite having several two-tier bento boxes, I actually find myself using a single layer box more often. I like the feel of all that open space to lay out the food, like for today's sunflower bento. You don't need any fancy accessories for this bento, and apart from laying out the fillings, it is pretty easy to make.

I made the sunflower using beef soboro (minced beef) and cut-up tamagoyaki (Japanese rolled omelette) - see how to make tamagoyaki for a pictorial step-by-step guide. The background is made out of cherry tomatoes and blanched snow peas on a bed of rice. I also added some stir-fried capsicum (hidden under the rice) for added flavour.

tamago5
Directions for the sunflower petals:
Make a rectangular shaped tamagoyaki and slice it into 1/4 inch (or 1/2 cm) pieces as shown in the picture. Cut each rectangular slice into half diagonally to make one petal. Arrange in a circle to form the sunflower.

How To Make Tamagoyaki (Rolled Omelette)

tamago5
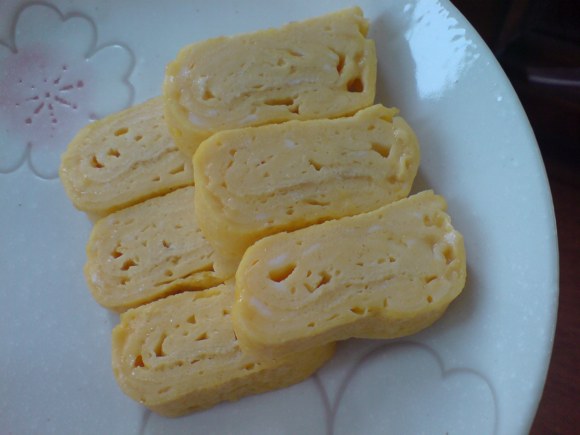
Tamagoyaki (lit. "egg fried") is a Japanese rolled omelette that is popularly eaten for breakfast in Japan, or used as a bento filling. It is also a common sushi topping. Despite it being one of the cheapest types of sushi available, it is also used as the ultimate test of a sushi bar (although apparently many sushi bars now do not make their own tamagoyaki, but serve a pre-made one).

For fans of Japanese food dramas, there is an excellent drama made in 1996 called Shota no Sushi (or King of Sushi), about a young sushi apprentice who dreams of becoming Japan's #1 sushi chef. One episode features his struggles to make the perfect tamagoyaki that is springy enough that it can bend in a U-shape without breaking.

There are many different tamagoyaki recipes. Some are sweet, others salty. Some add dashi (a Japanese stock made by boiling kombu (kelp) and katsuobushi (dried bonito flakes)), and others mirin (Japanese rice wine). My preference is to add mirin but not dashi, and I skip the sugar as eggs for me should taste savoury. Sometimes if I'm in a rush, I'll skip the mirin as well, and just make a plain soya sauce version... In other words, my tamagoyaki is not a traditional Japanese one, but rather a rolled omelette, but hey, it still tastes good...

Continue reading...


How to Make Tamagoyaki
Tamagoyaki is usually made in a rectangular shaped frying pan, but if you don't have one (like me), you can use a small, round, non-stick frying pan.

2 large eggs
sprinkle of sugar (if you want it sweet)
1/2 tsp mirin
1/4 tsp soya sauce
light olive oil (or other cooking oil)

1. Mix the eggs, sugar, mirin and soya sauce together lightly.

2. Pour a small amount of oil (approx 1 tsp) into a small non-stick frying pan and swirl it around with a spatula to coat the bottom. Heat up the pan on low heat.

tamago1
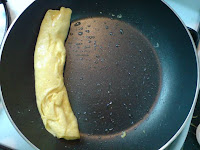
3. Pour 1/3 of the egg mixture into the frying pan and swirl the pan around so the egg coats the base evenly. When the egg is half-cooked, carefully move the spatula around the edge of the circle of egg to loosen the egg from the pan. Starting at one edge, fold/roll the egg over and over until it has reached the other side of the pan.


tamago2
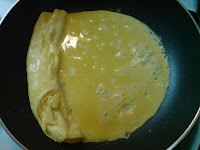
4. Pour 1/2 of the remaining egg mix into the pan beside the rolled egg. Some people coat the pan with more oil before pouring more egg in - do this if you need to, but I find my non-stick pan doesn't require more oil (you can see there are enough drops of oil in the above photo). Lift up the rolled egg to allow the raw egg mix to flow underneath it.


tamago3
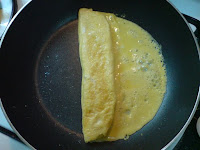
5. Beginning at the edge of the rolled egg, fold/roll it over the half-cooked egg until all the egg has been rolled up. (ie. in the photo, the egg is being rolled from left to right.)


tamago4
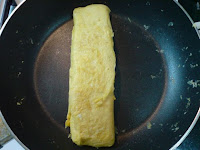
6. Repeat steps 4. and 5. with the remainder of the raw egg mix. ie. pour the egg mix into the pan next to the rolled egg, and lift the rolled egg up to allow the raw egg to flow underneath it. Starting at the edge of the rolled egg, roll it back to the other side.


tamago5
7. Cook for a little longer, then remove from the pan. If you are using a round pan, you may wish to reshape the tamagoyaki at this point. Using a bamboo rolling mat, put the warm tamagoyaki on the mat and roll it up or shape it accordingly. Cool, then slice. If you don't want to shape it, it will turn out rectangular with rounded edges (as in the photo).


Update: If you find yourself making tamagoyaki regularly, you may wish to invest in a small, rectangular shaped non-stick pan. I picked one up at a cheap price, and it has been really handy.

Monday, September 1, 2008

How To Make Onigiri

Onigiri are Japanese rice balls and are often round or triangular in shape. They can be made of plain rice, or have a salty/sour filling inside. They are also often wrapped in nori (seaweed). 

Onigiri is quite simple to make at home. Cook some short-grained rice (using a rice cooker is easiest). You can make the onigiri with plain rice, or sushi rice. I like to make onigiri with sushi rice as it adds more flavour.

For sushi rice, put the rice in a large container and stir in some sushi vinegar (available at most supermarkets or Asian supermarkets these days). If you must, you can also make your own sushi vinegar by mixing rice vinegar, sugar and salt together. Continue to stir the rice and fan it a little as you stir to cool it down slightly. Taste the rice and add more sushi vinegar until you are happy with the amount.

The easiest way to make onigiri is with an onigiri mould. You can find a cheap plastic mould quite easily these days in Japanese supply stores.

Or else, tear off a piece of strong plastic wrap (around 20cm in length) and put it on the palm of one hand (with your palm bent in a cup-shape). Scoop some rice onto the plastic in your palm, add some filling in the middle, and scoop more rice on top to cover the filling. Use a tablespoon or teaspoon to measure how much rice you add so your onigiri are similar in size. Close your palm, gather up the ends of the plastic wrap with your other hand, and twist the wrap together. Squeeze the rice tightly together to form your onigiri, and shape it according to whatever shape you like (round, triangular, etc).

Update: See my post on How To Make a Monokuro Boo Bento for a pictorial guide on making and shaping onigiri this way (See Steps 1 - 4).

Make sure the rice is warm, or the onigiri will fall apart. Re-heat the rice in the rice cooker or microwave if it cools down halfway.

Wrap the onigiri in nori (seaweed) just before eating. You can also wrap them beforehand, if you don't mind soggy nori.

Some common onigiri fillings are plum, salted salmon, tuna, teriyaki chicken.

Back

Thursday, August 21, 2008

How To Use Egg Shapers

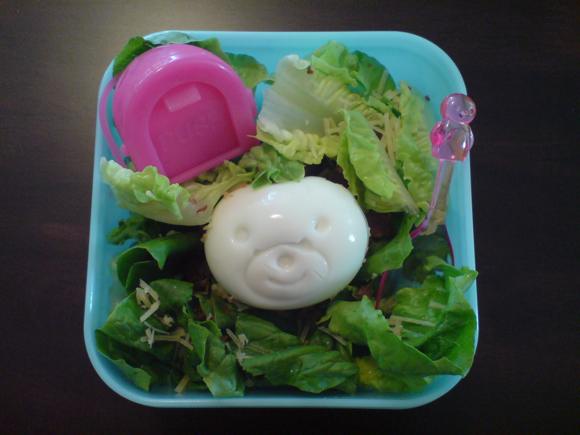
Place a large-sized egg in cold water, bring to the boil. Once the water is boiling, simmer on low heat for 5-7 minutes. Remove the egg, carefully peel away the shell, and put the egg inside a slightly wet egg shaper. Click the egg shaper shut. Put in the fridge for 10-15 minutes, or if you prepare the egg the night before, just keep the egg in its shaper in the fridge overnight and open it in the morning.

I've also read instructions where people put the egg shaper in the freezer - I've not tried this, but I guess the cooling principle is the same. If your eggs are too small for the shaper, you won't get a complete shape - like my ear-less bear above.

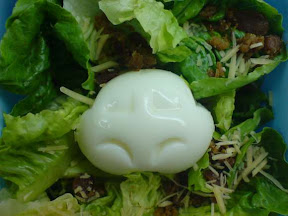
egg car
A car-shaped egg!

Friday, August 15, 2008

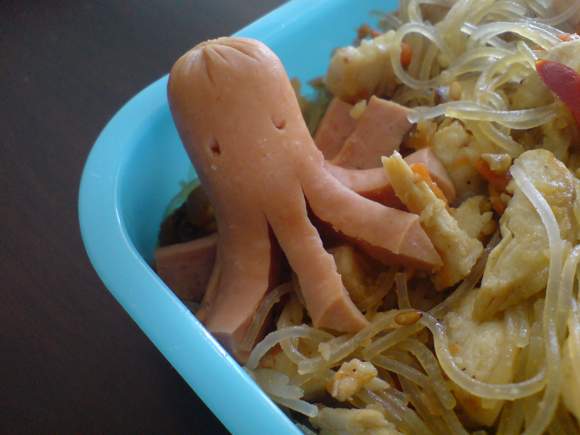
how to make octopus frankfurters

octopus 4
Here's how I make my octopus franks:

Continue reading...


octopus1
Step 1: Take a frankfurter and cut it into half. I find shorter, thin frankfurters work well.

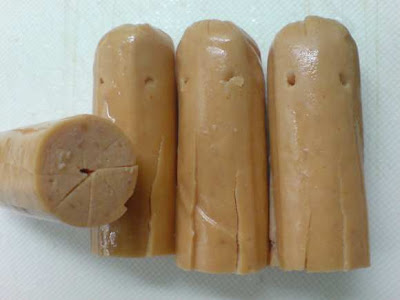
Step 2: Hold the frankfurter vertical with the cut side up. You will see it is circular in shape. Imagine it is like a round pie you are going to divide into eight equal slices. This will form the eight legs of the octopus.

Firstly make a vertical slice down to cut the 'pie' into half. Keep going until you reach about 2/3 of the way down the frankfurter. The remaining 1/3 will form the body of the octopus.

Step 3: Rotate the frank and make a similar vertical slice 2/3 down the frank to divide the 'pie' into 4 equal quarters.

Step 4: Rotate the frank again, and slice down to make six, then eight sections. Take care on these last two cuts as it is easy for the legs to break off here. Try to divide the pieces as evenly as possible so the legs are of equal width. It helps to hold the other pieces together tightly as you slice (watch your fingers, though).

Step 5: Cut two eyes in the body section of the octopus by twisting two small holes into the frank with your knife, a skewer or chopstick. I find a pointed chopstick works well.

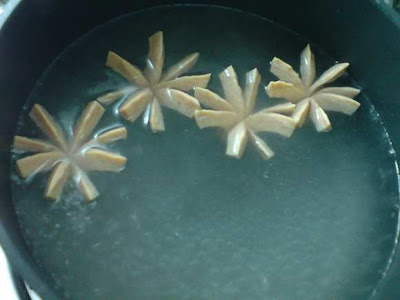
Step 6: Boil water in a small pot. Put the franks inside and boil for a few minutes (or follow the instructions for your brand of franks). Watch as the legs magically spread out in the water! Your octopus franks are learning to swim...

octopus2

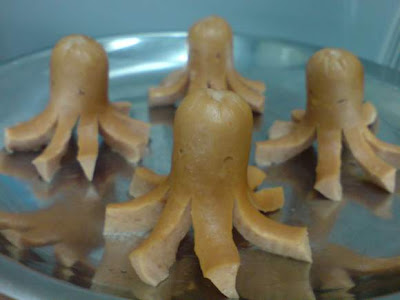
Step 7: Once the legs have opened, remove the octopus franks and use them to decorate your bento or any other dish to thrill your kids (or yourself)!

octopus3

There are several other methods for slicing the legs, but I find this method gives the best control to create legs of even width. Another option is to panfry the franks a little to give them more colour.

Back