I have taken a short break from
kyaraben (character bento) recently as they do take some time to make, and I have not been feeling too inspired. However, when I read that the topic for this week's bento challenge over at the
Live Journal Bento Challenge community was "twins", I suddenly wanted to make a Monokuro Boo Bento. I love these monochrome square-shaped pigs by San-X, and to fit the Bento Challenge theme, I have decided the pigs are fraternal twins...
My Monokuro Boo pigs are rice onigiri filled with salmon flakes. One is wrapped, and the other isn't (to form one black and one white pig). They are sitting in a colourful garden of carrot, cheese and egg flowers, edamame, broccoli and cherry tomatoes, and some ham and egg rolls.
Step-by-Step Guide: How To Make a Monokuro Boo Bento
Ingredients:
(For 2 Monokuro Boo Pigs)
- 6 heaped Tbsp cooked short-grain rice
- Filling for the onigiri (I used salmon flakes, but you can use whatever filling you wish)
- 1 triangular sheet of nori seaweed
- + extra piece nori
- 1 slice processed cheese
For the rest of the bento (if you wish to follow the bento pictured) or feel free to substitute with other vegetables, meat, etc.
- 1/4 carrot
- 1 large egg
- 2 slices ham
- edamame
- broccoli
- 2 cherry tomatoes
Equipment:
- Small paring knife
- Scissors (preferably small ones)
- Small circle cutter or a straw
- Flower-shaped cutter (ordinary cookie cutters are fine), or any shaped-cutter you prefer eg. stars, hearts, etc.
- Small frying pan (to fry the egg) and small saucepan (to cook the broccoli)
- 1 bento box (I used a single tier, 630ml capacity container, but you can use other sizes - the amount of food you fit around the pigs will just increase/decrease according to what size box you use.)
Step 1 - Making the Onigiri (Rice Balls)
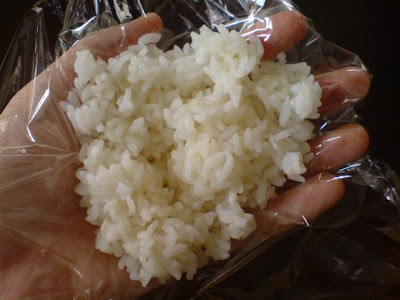
Start by making 2 rice onigiri. If your rice is cold, sprinkle a few drops of water over the rice and warm it up in the microwave. Tear a square-shaped piece of strong plastic wrap and place it on the palm of your hand. Scoop 2 heaped Tbsp of warm rice onto the plastic wrap in your palm.
Step 2 - Filling the Onigiri
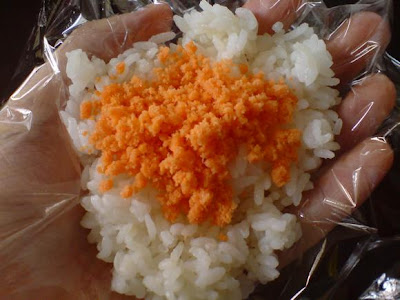
To make an onigiri with filling, add your filling on top of the rice. Here, I have added a few tsps of salmon flakes. Other fillings you can use - teriyaki chicken bits, canned tuna with mayo, minced beef soboro, etc.
If you just want to make a plain rice onigiri without any filling, proceed to Step 3.
Step 3 - Completing the Onigiri
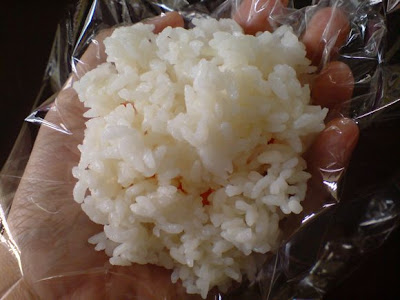
Add 1 heaped Tbsp of rice on top of the filling to cover it. (For a plain onigiri, just add 1 Tbsp of rice. You can also sprinkle a little salt on the rice for flavour.)
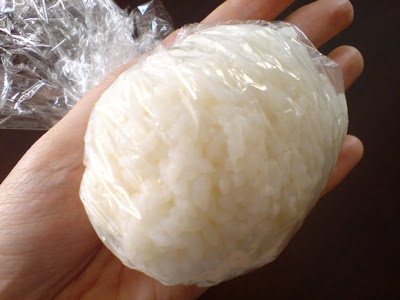
Gather up the sides of the plastic wrap by closing your fingers inwards (as if you were gripping a tennis ball in your palm). Twist the plastic wrap together at the top. You should now have a ball of rice.
Step 4 - Shaping the Onigiri
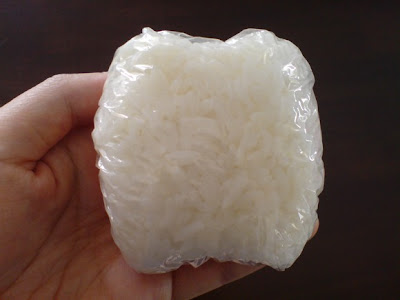
Compress the rice together and shape the onigiri as you desire. As we are making Monokuro Boo, press the rice ball to form a flat square shape, and squeeze out two ears and two feet at each end of the square. Set aside the shaped onigiri in the plastic wrap, and repeat Steps 1 - 4 for the second pig.
Step 5 - Making the Black Pig
(You should now have two pig-shaped onigiri wrapped in plastic.)
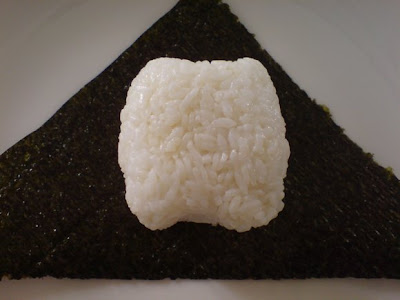
To make the black coloured pig, take one of the onigiri and warm it up in the microwave for 10 seconds. You need the rice to be warm so the nori wraps around it easily.
Place a triangular piece of nori (seaweed) on a flat surface. (You can buy triangular-shaped nori, or just cut a big square of nori into half diagonally to form a triangle.) Unwrap the warm onigiri and place it on the nori seaweed.
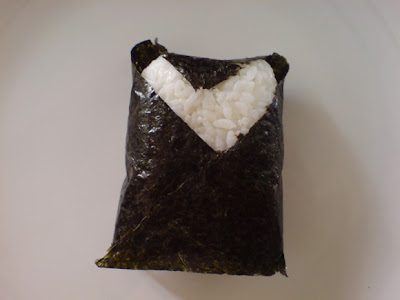
Wrap the nori around the onigiri by tucking the top down (the ears will form quite naturally) and wrap the sides around the square. The back should look something like this -
...and the front should look something like this -
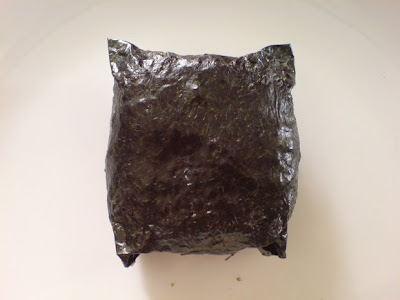
Tuck and squeeze the nori a little to form the legs.
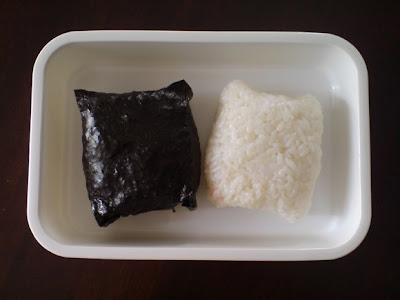
Place the wrapped nori pig and the white rice pig into a bento box. Set aside as you prepare their faces.
Step 6 - Making the Eyes and Noses
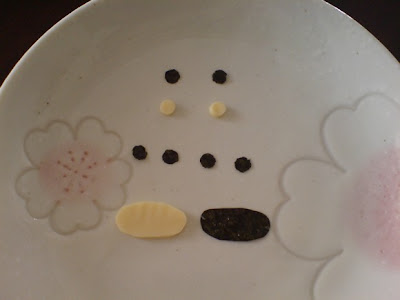
Eyes
Black Pig: Take a slice of processed cheese and cut out 2 little circles using a straw or a little round cutter.
White Pig: With a small piece of nori, cut out 2 little circles using a nori face punch, or a small pair of scissors.
Nose
Black Pig: With a sharp paring knife, cut out an oval-shaped piece of cheese for the nose. Estimate the size of the nose according to the size of your onigiri pig. Tip: If you are unsure of how big it should be, cut out a larger oval, and slowly trim the ends until it is the right size.
White Pig: With a small pair of scissors, cut an oval out of nori. Try to make it the same size as the cheese oval you just made.
Nostrils
Black & White Pig: Cut out 4 small oval shapes out of nori, using a pair of scissors. The nostrils should be slightly smaller than the eyes.
If you used a nori face punch to cut out the eyes, cut out 4 more small circles, then convert them into oval shapes with the scissors. (This is what I did, therefore the nostrils in the above picture are round as I had not shaped them yet. See the picture below for the shaped nostrils)
Step 7 - Adding the Faces
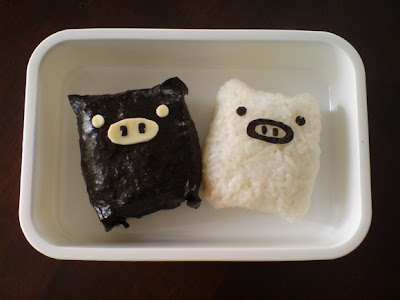
Black Pig: Place the cheese eyes, cheese nose, and nori nostrils onto the black pig.
White Pig: Place the nori nose lightly onto the white pig, then quickly lift it off before it sticks. The nori should now be soft, but not soggy. Fold the nose slightly and make a small cut in the centre with a pair of scissors. Then unfold and cut around the inside of the oval to make an oval ring as pictured. Place the nose on the white pig, as well as the nori nostrils and eyes.
Your Monokuro Boo pigs are now complete!
Step 8 - Packing the Rest of the Bento
Now surround the pigs with colourful vegetables, meat, eggs, etc. of your choice.
Here is what I added:
- steamed broccoli;
- carrots (shaped into flowers using a flower cookie cutter. You can also shape them into stars, hearts, etc.);
- cherry tomatoes;
- edamame;
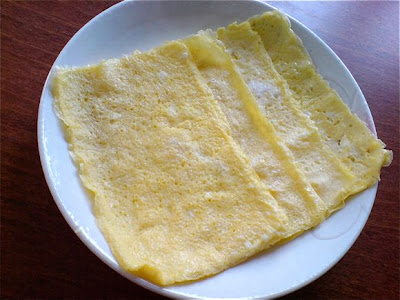
- ham and egg rolls (Edit: Link added for the ham n egg rolls);
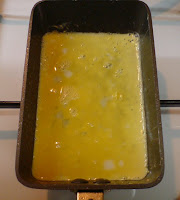
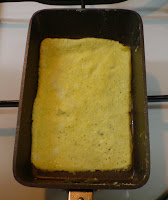
- egg (fried thinly, then cut into flower shapes);
- processed cheese (cut into flowers - a good way to use up the remainder of the cheese slice).
How I packed the bento:
I began by selecting the "harder", more bulky items. In this case, it was the broccoli, which I added around the sides of the bento box.
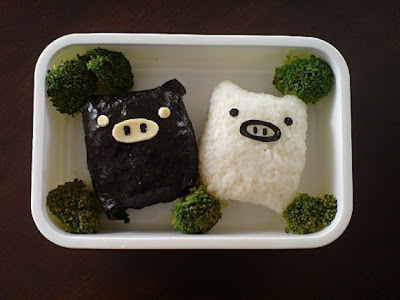
This was followed by the cherry tomatoes and the ham and egg rolls.
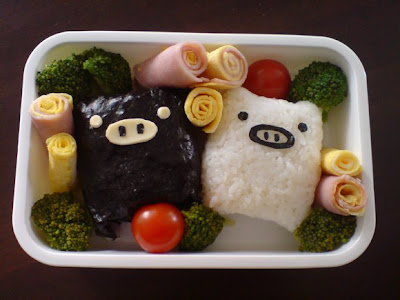
Next, half of the carrots and the edamame were added to fill in the gaps. The remaining carrots were placed on top to create a flower scene, and the egg and cheese flowers were added for further colour and design. The completed bento:

Back


